Setting Up Your Wi-Fi Time Clock
Your Time Clock is all set up and ready to go. You just need to attach it to the wall and start clocking in!
Turning The Time Clock On
- The power button is located at the top right of the device, on the side, just above the volume button. Hold the power button until the screen flashes on.
Connect To Your Wi-Fi Network
- To connect to Tanda your device will need Wi-Fi access. To connect your device, swipe down in the top right hand corner of the screen to bring up the menu below
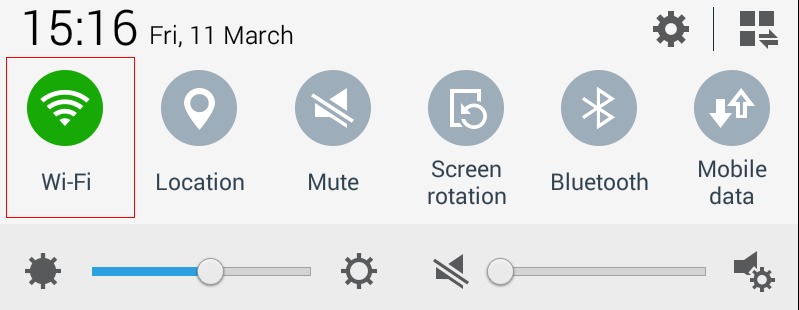
- Ensure the Wi-Fi icon is green and click the cog icon in the top right hand corner
- Under the “Connection” tab at the top, cick “Wi-Fi” under the “Network Connection” header on the left hand side.
- Click on your Wi-Fi network under the “Wi-Fi Networks” header and enter your network password.
- Once connected, click the home button on the front of the device to return to the Tanda App.
Test Your Clock-Ins
- Test the Time Clock by entering your passcode and tapping “clock in”. The Time Clock will welcome you once you clock in.
- Login to my.tanda.co/login with your details and on the Dashboard you will see your clock-in. If you don’t see your clock-in here after 5 minutes, there may be an issue with your network connection. Contact Tanda Support at support@tanda.co to let us know.
Attach Your Time Clock To The Wall
- It’s important to put your Time Clock somewhere easy for everyone to remember to clock in and out and also within reach of a power point. If possible, try to keep it out of direct sunlight.
- Once you’ve selected a location, test a few different heights. Ideally both your shortest and tallest staff will be visible to the camera.
- Ensure that the surface which you are about to attach the Time Clock to is clean.
- Remove the backing from the velcro attached to the back of the device and slowly push the Time Clock into position onto the wall until all of the velcro has stuck firmly.